
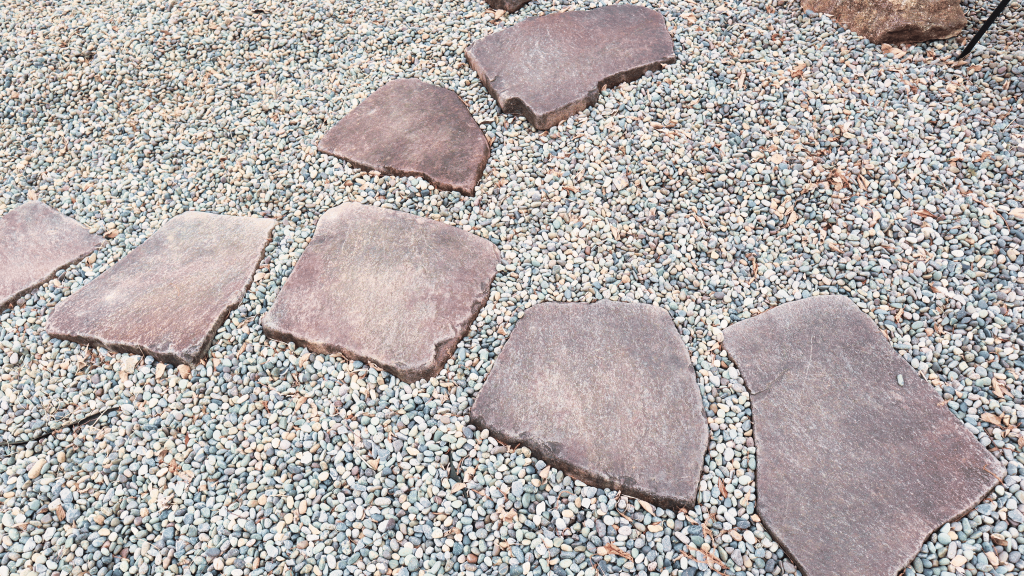
Making a gravel and stepping stone pathway is a lovely and functional addition to your garden or outdoor area. Not only it makes the pathway beautiful, but also affordable and low-maintenance. In this tutorial, we will take you through the steps of how to lay gravel and stepping stones, step by step.
Planning Your Pathway
Design Your Way
Plan the layout of your pathway before you begin digging. Trace the route you desire using a garden hose or a rope. This aids in visualizing the design and making adjustments where necessary before deciding to dig.
Use the Appropriate Materials
Choosing the appropriate materials is important to the life and the look of your pathway. In the case of stepping stones, you can use concrete pavers, natural stone or even recycled materials. Gravel can be in the form of pea gravel, crushed stone or decomposed granite. Select colors and textures that match your garden and landscape.
Ground Preparation
Clear Area
Clear the area of any grass, weeds or other debris where you want to lay the pathway. This will give you a clean surface of your gravel and stepping stones.
Blaze the Trail
Mark the pathway boundaries using stakes and string or spray paint. This will act as a guide in excavation and assist in keeping straight lines.
Trench Digging
Dig a trench by means of a spade or shovel along the marked path. Gravel paths should be approximately 4-6 inches deep with stepping stones being a bit deeper to provide stability. In the case of stepping stones, each stone should have a hole.
Compress the Soil
Tamp the soil at the bottom of the trench with a hand tamper or mechanical compactor. This gives a good base and it does not settle with time.
The Foundation
Apply a Sand Layer
Apply a layer of coarse sand 2 inches thick over the compacted soil. This layer assists in drainage and makes the gravel or stepping stones stable. Even out the sand with a rake.
Compress the Sand
Once more, press the sand in with a tamper. This is an important step in avoiding shifting and settling that may cause uneven surfaces.
Install Edging
To retain the gravel and stones, place edging on both sides of your pathway. You may use metal, plastic and wooden edging. Stake the edging down to keep it in position.
Spreading the Gravel
Scatter the Gravel
Put the gravel in the trench, beginning at one end and moving towards the other. Shoot to a depth of 2-3 inches. Spread the gravel with a rake to cover evenly and fill any gaps.
Pack the Gravel
Compact the gravel with a plate compactor. This is necessary to ensure a solid surface that will not move under the feet. Pound the gravel into layers, going back and forth over the space until it settles.
Add More Gravel as Needed
Some settling may be noticed after compacting. Add additional gravel to fill low areas and repeat the compaction.
Installation of Stepping Stones
Place the Stones
Install each stepping stone in its own hole. Ensure that they are straight and spaced. Check with a level to ensure evenness and adjust accordingly.
Gravel or Sand Fill
Fill gaps between stones by pouring sand or a fine gravel around the edges. This assists in anchoring the stones and avoids the growth of weeds between the stones.
Compress the Surrounding Space
Compact the sand or gravel around the stones using a tamper. This action makes sure that the stones are stabilized and level.
Final Touches
Border the Walk
Install edging around the edges of your pathway to hold the gravel and stones in place, in case you have not done this yet. This also provides your pathway a clean finished appearance.
Plant Mulch or Plants
You might want to use mulch or even plant some flowers and shrubs along your pathway. This improves the look and makes the pathway part of your garden.
Keep Your Way
The key to maintaining your gravel and stepping stone pathway in good shape is regular maintenance. Periodically rake the gravel to make it level and to remove any debris. Ensure that the stepping stones have not moved and re-level them where needed.
Success Tips
Measure Correctly: Measure properly to prevent wastage of work and materials.
Select the Appropriate Tools: The availability of the right tools such as a good quality tamper and compactor will make the work easier and more effective.
Think Drainage: Make sure your pathway is well drained so that water does not pool and cause erosion.
With these steps, you can make a good-looking and useful gravel and stepping stone pathway that will make your outdoor area more beautiful. This is a fulfilling project that will enhance the appearance and functionality of your garden.