
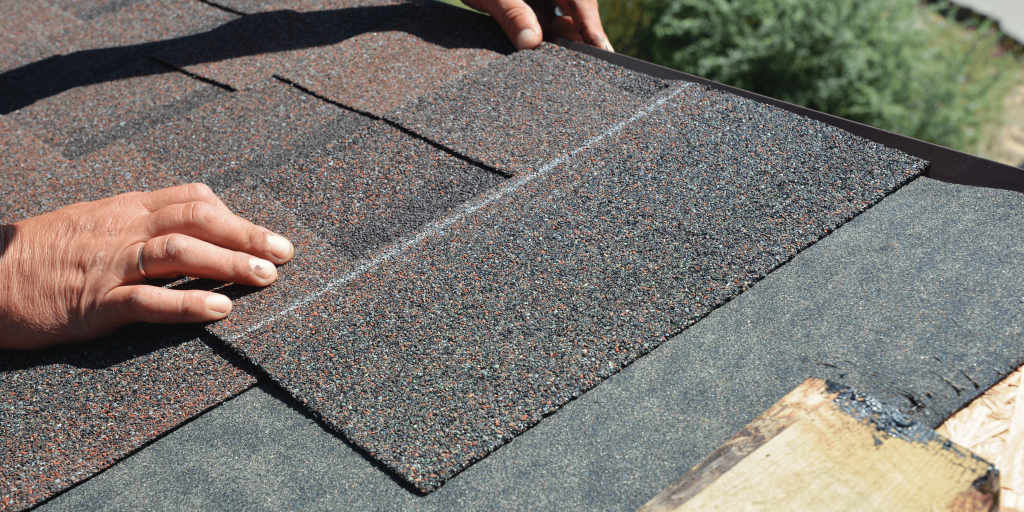
One of the most used roofing in the United States is asphalt roofing. It is long lasting, cheap and comparatively simple to set up, hence making it a best seller to the home owners. In case you are thinking about a new roof or a replacement, some knowledge of how to install it would save time, money and stress. In this tutorial, we would take you step by step to understand how to install asphalt shingles.
What Is Asphalt Roofing?
It is always good to know what asphalt roofing is before getting into the installation. Asphalt shingles are constructed of fiberglass material (usually) covered with asphalt and overlaid with ceramic particles. These shingles are meant to safeguard your house against the weather conditions such as snow, rain and wind.
Asphalt shingles are available in two major types:
Three-Tab Shingles: The shingles are lightweight and flat in nature and are affordable and give a uniform appearance.
Architectural Shingles: They are thicker and appear layered giving them better durability and a high-end appearance.
Tools and Materials You’ll Need
Proper preparation is crucial for a successful installation.
Here’s a list of tools and materials you will need:
- Asphalt shingles (depending on size of roof)
- Roofing nails
- Hammer or roofing nail gun
- Utility knife
- Roofing felt (underlayment)
- Roof cement or sealant
- Chalk line
- Measuring tape
- Ladder
- Protective clothing (gloves, goggles, harness, as required)
Step 1: Prepare the Roof
The most important thing in an asphalt roof is to prepare it properly.
Remove Old Roofing
In case your roof has old shingles, then they should be taken off. Scrape the old shingles off with a roofing shovel or pry bar. Care should be taken not to tear the roof deck underneath.
Inspect the Roof Deck
After the old shingles have been removed check the roof deck. substitute rotten or decayed wood. Proper installation is achieved by a clean solid surface.
Clean and Dry the Roof
The roof should be clean and dry before the installation of new shingles. Remove debris, nails, and dust. This helps in avoiding the chance of the moisture being trapped under the shingles.
Step 2: Install Roofing Underlayment
A protective layer is the underlayment which is laid beneath the shingles. It creates a moisture barrier and is also a further defense of leaks.
Lay Down Roofing Felt
Begin at the bottom of the roof and roll the felt in a horizontal direction. Overlapping every row with approximations 2-4 inches. Fasten the felt by roofing nails or staples.
Seal Roof Penetrations
Use roof cement on vents and chimneys and other protrusions to avoid leaks.
Step 3: Install Drip Edge
The drip edge is a metal strip installed along the roof’s edges. It helps water flow into the gutters instead of under the shingles.
- Install the drip edge on the eaves.
- Nail it every 12-16 inches.
- Install drip edges on the slopes (rakes) of the underlayment.
Step 4: Plan Your Shingle Layout
Before nailing the shingles, lay out the plan so that you do not make mistakes and waste.
Snap Chalk Lines
Draw horizontal lines with the help of a chalk line. This serves to make sure that shingles are straight and well-spaced.
Starter Strip
At the bottom of the roof, install a starter strip. This helps to keep water under the first row of shingles. This is done by a variety of manufacturers of pre-cut starter shingles.
Step 5: Install Asphalt Shingles
The next step is the big one; laying the shingles.
Start at the Bottom
To be done starting at the bottom and proceeding upwards. Lay the initial row of the shingles on top of the starter strip and nail it in. As a rule, 4 nails to the shingle are sufficient, and consider the manufacturer.
Stagger the Seams
Shingles must be staggered to avoid leakages. In the case of three-tab shingles, this is to say that there are no line-up cutouts between rows. In the case of architectural shingles, use the pattern of layout recommended by the manufacturer.
Continue Row by Row
Lay the shingles, row-over-row on the roof, as per the specification of the shingles (about 5 inches). Clipped shingles are used to cover the roof edges and valleys.
Ridge Cap Shingles
After the top is reached, wring ridge cap shingles on the roof ridge. They give it a completed appearance and prevent water seepage on the peak.
Step 6: Flashing and Ventilation
Flashing and proper ventilation are critical for a long-lasting roof.
Install Flashing: Metal Flashing Metal flashing of chimneys, vents and skylights. Not only nail but roof cement.
Provide Adequate Ventilation: Ridge vents or roof vents is one of the measures to avoid heat and moisture trapping in your attic.
Step 7: Clean Up and Inspect
After installing the shingles:
- Eliminate pieces of debris and nails.
- Check the roof of the house and see whether there are gaps, as well as loose shingles or improperly sealed areas.
- Scrape gutters of the installation procedure.
Cleaning up properly is a way of keeping safe and avoiding possible damage to the roof.
Safety Tips for Asphalt Roof Installation
Roof work can be dangerous, so follow these safety precautions:
- The ladder must be strong and there should be a helper.
- Put on slippers and gloves.
- Wear a safety harness when working on high roofs.
- Do not be too careless when there is hot weather, because shingles may be slippery.
Maintenance for Longevity
Even after a professional installation, maintaining your asphalt roof can extend its life.
- Examine your roof at least once in a year.
- Keep gutters and downspouts
- Repair broken shingles.
- Cut hanging branches of the trees to avoid accumulation of debris.
Common Mistakes to Avoid
Skipping the Underlayment: This may cause leakages.
Incorrect Nailing: Nails are not enough or incorrectly positioned and this shortens the life of the shingles.
Poor Ventilation: Traps heat and moisture, hence damaging.
Ignoring Manufacturer Instructions: The installation requirements of each of the shingle brands can be different.